
To serve a truly localized version of your site (e.g., hi.yoursite.com for Hindi), MultiLipi requires a DNS handshake. By creating a specific CNAME Record, you authorize our infrastructure to handle traffic for that specific language subdomain, while your main site remains untouched on your original server.
Tämä opas kuvaa CNAME Injection Protocol required to take your languages live.
1. The Routing Architecture
Understanding the flow.
Your Main Domain
example.com
→ Points to Your Server (Shopify/Webflow/WordPress)
The Language Subdomain
hi.example.com
→ Points to MultiLipi Translation Engine
We achieve this split-routing using a CNAME (Canonical Name) record. This acts as a traffic sign, telling browsers: "For the Hindi version, go to MultiLipi."
2. Step 1: Provisioning the Endpoint
Before touching your DNS, you must generate the unique destination target.
Access Dashboard:
Log in to MultiLipi and select your project.
Navigate to Setup:
Go to New Project.
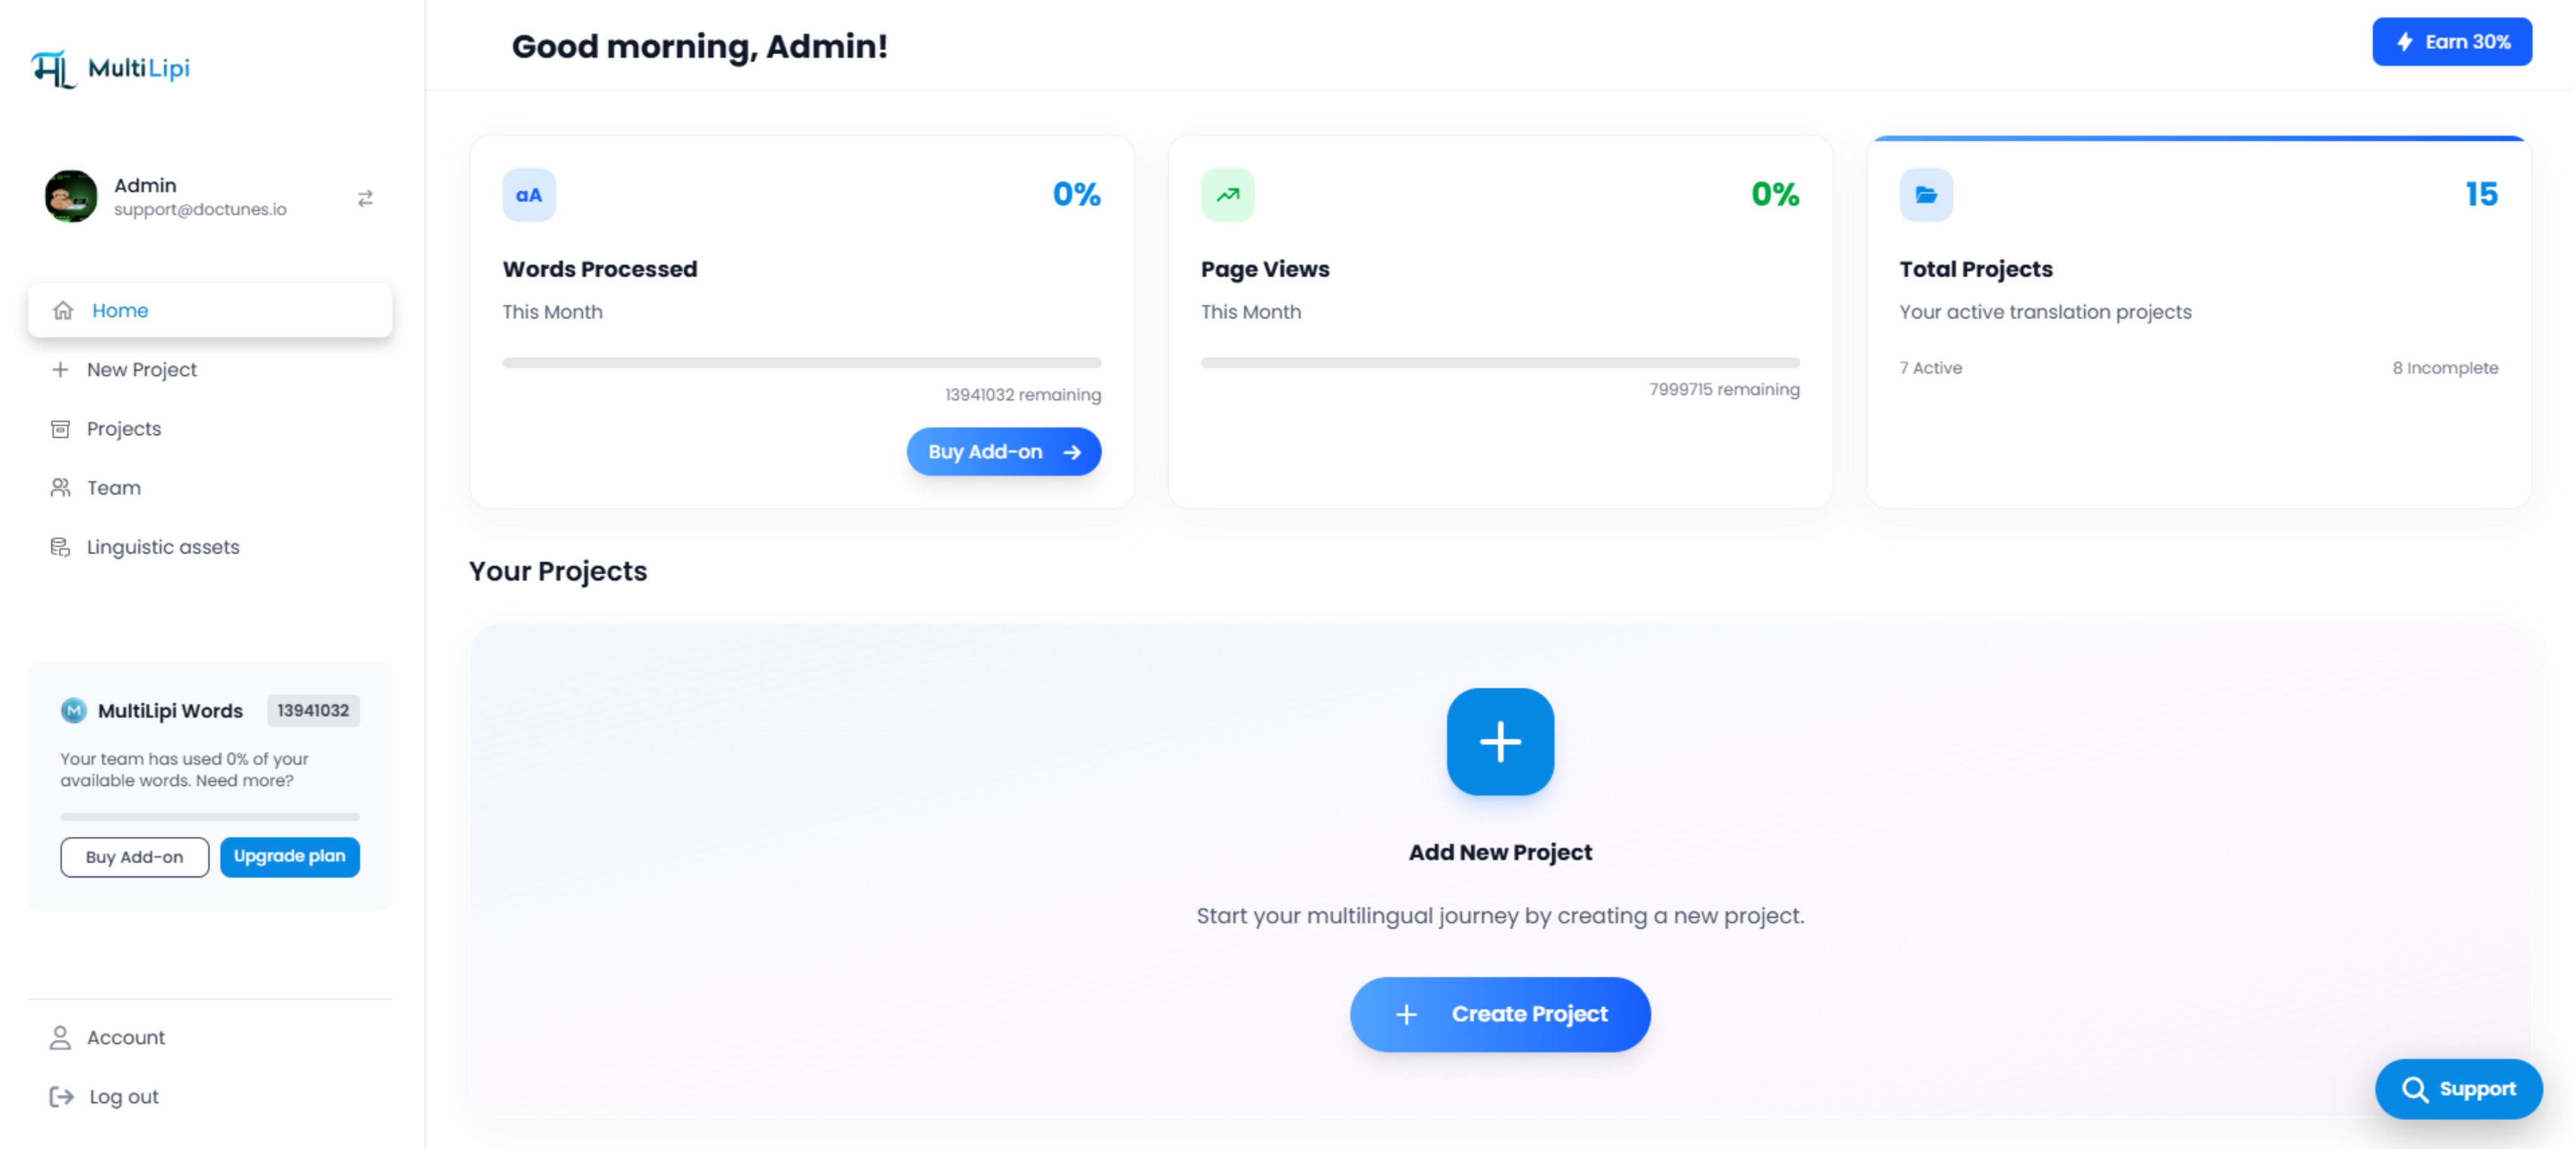
MultiLipi dashboard with "Add New Project" interface
Select Languages:
Choose the languages you wish to deploy (e.g., Hindi, French).
Generate Values:
The system will output a unique Host and Value pair for each language.
Example Output:
Moikka multilipi.centralindia.cloudapp.azure.comNote: Your specific endpoint may vary based on your region.
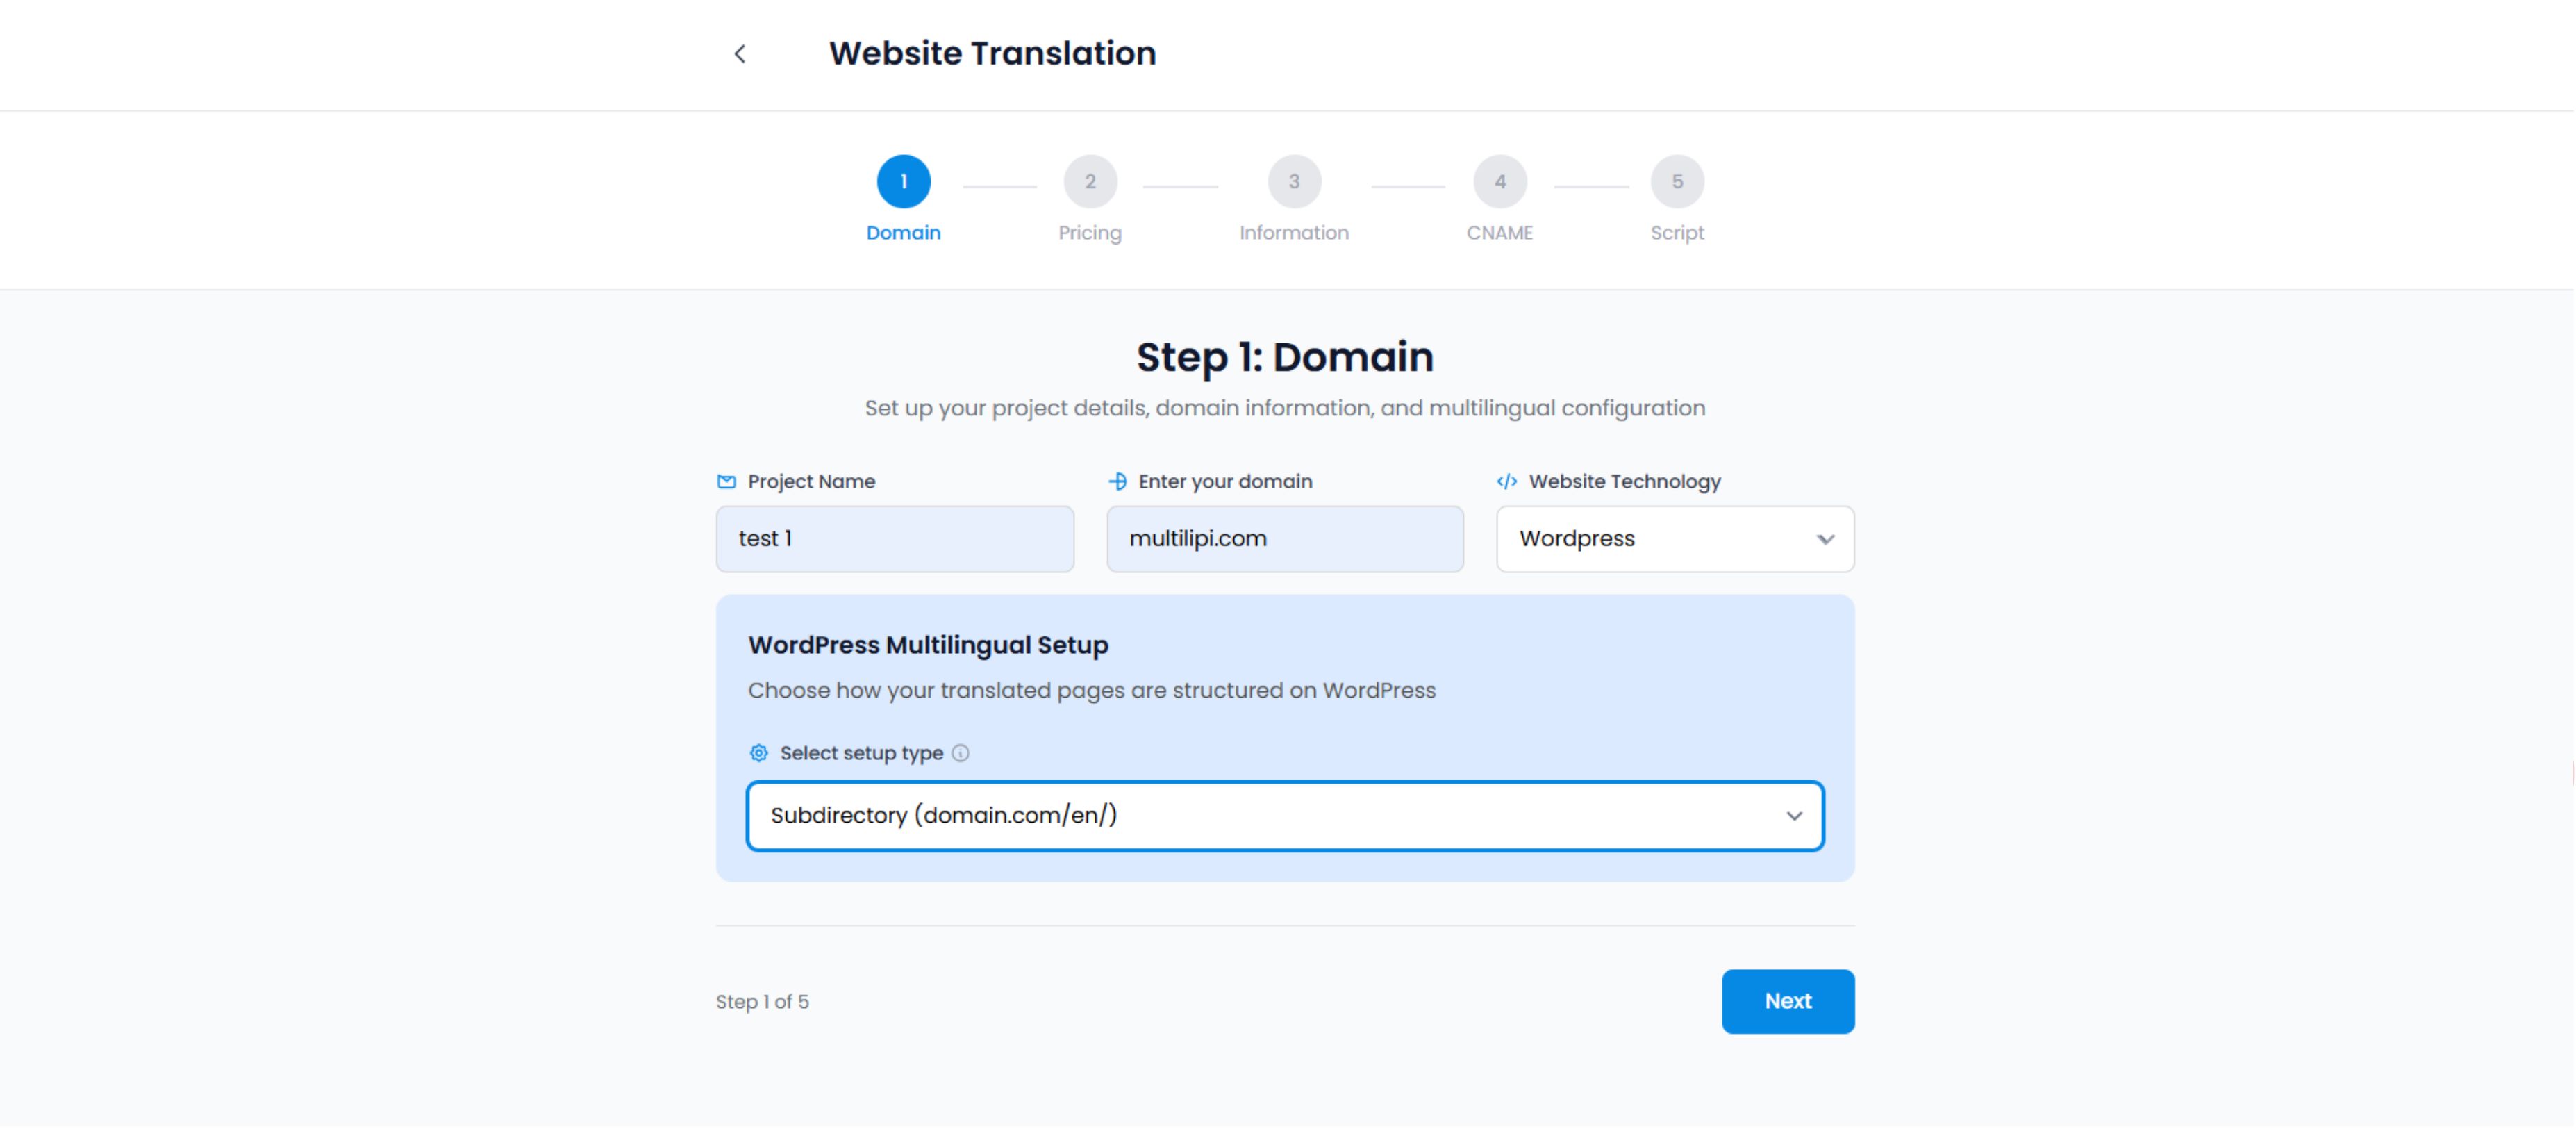
Website Translation setup wizard - Domain configuration step
3. Step 2: DNS Injection (Registrar Side)
Log in to your DNS provider and access the DNS Management panel.
Log in to your DNS provider (GoDaddy, Cloudflare, Namecheap, Route53) and access the DNS Management panel.
The Record Configuration:
You must add a separate record for each language you want to serve on a subdomain.
| Record Type | Name / Host | Value / Target | TTL |
|---|---|---|---|
| CNAME | Moikka | [Paste Value from Dashboard] | 1/2 Hour (or Automatic) |
| CNAME | fr | [Paste Value from Dashboard] | 1/2 Hour (or Automatic) |
Tyyppi: Always select CNAME.
Name: The language code (e.g., hi, fr).
Arvo: The Azure endpoint provided in your dashboard (e.g., multilipi.centralindia.cloudapp.azure.com).
TTL (Time to Live): Set to 1/2 Hour or Automatic to ensure quick propagation.
⚠️ Critical for Cloudflare Users:
If you use Cloudflare, you must turn OFF the "Orange Cloud" (Proxy Status) for these specific CNAME records. Set them to "DNS Only" (Grey Cloud). MultiLipi handles the SSL and caching for these subdomains; double-proxying often causes SSL errors.
4. Step 3: Propagation & Verification
DNS changes are not always instant. They must propagate across the global internet.
Wait:
Propagation typically takes 15–30 minutes (but can take up to 24 hours).
Verify in Dashboard:
Click the "Verify" button in your MultiLipi setup panel.
Success: The status indicator turns Green.
Failure: The system cannot detect the record. Check for typos or Cloudflare Proxy settings.
Live Test:
Visit hi.yoursite.com. You should see your site loaded with the language switcher active.
Troubleshooting the Handshake
Common issues and their solutions
SSL Errors:
If you see a "Not Secure" warning on the new subdomain, wait 15 minutes. MultiLipi automatically provisions a managed SSL certificate for the subdomain once the DNS record is verified.
404 Error:
Ensure you entered the exact target value provided in the dashboard. A single typo will break the route.