How to Create Glossary Rules in MultiLipi (Translation Exceptions)
MultiLipi's Glossary Manager allows you to define fixed translation rules for specific words or phrases ensuring consistency across your multilingual content. Whether it's brand names, technical terms, or industry-specific keywords, you can make sure they are always translated the way you want.
Step-by-Step: How to Add or Upload Glossary Rules
1. Navigate to the Glossary Panel
From your MultiLipi dashboard, go to the left sidebar and click on:
Translations → Glossary
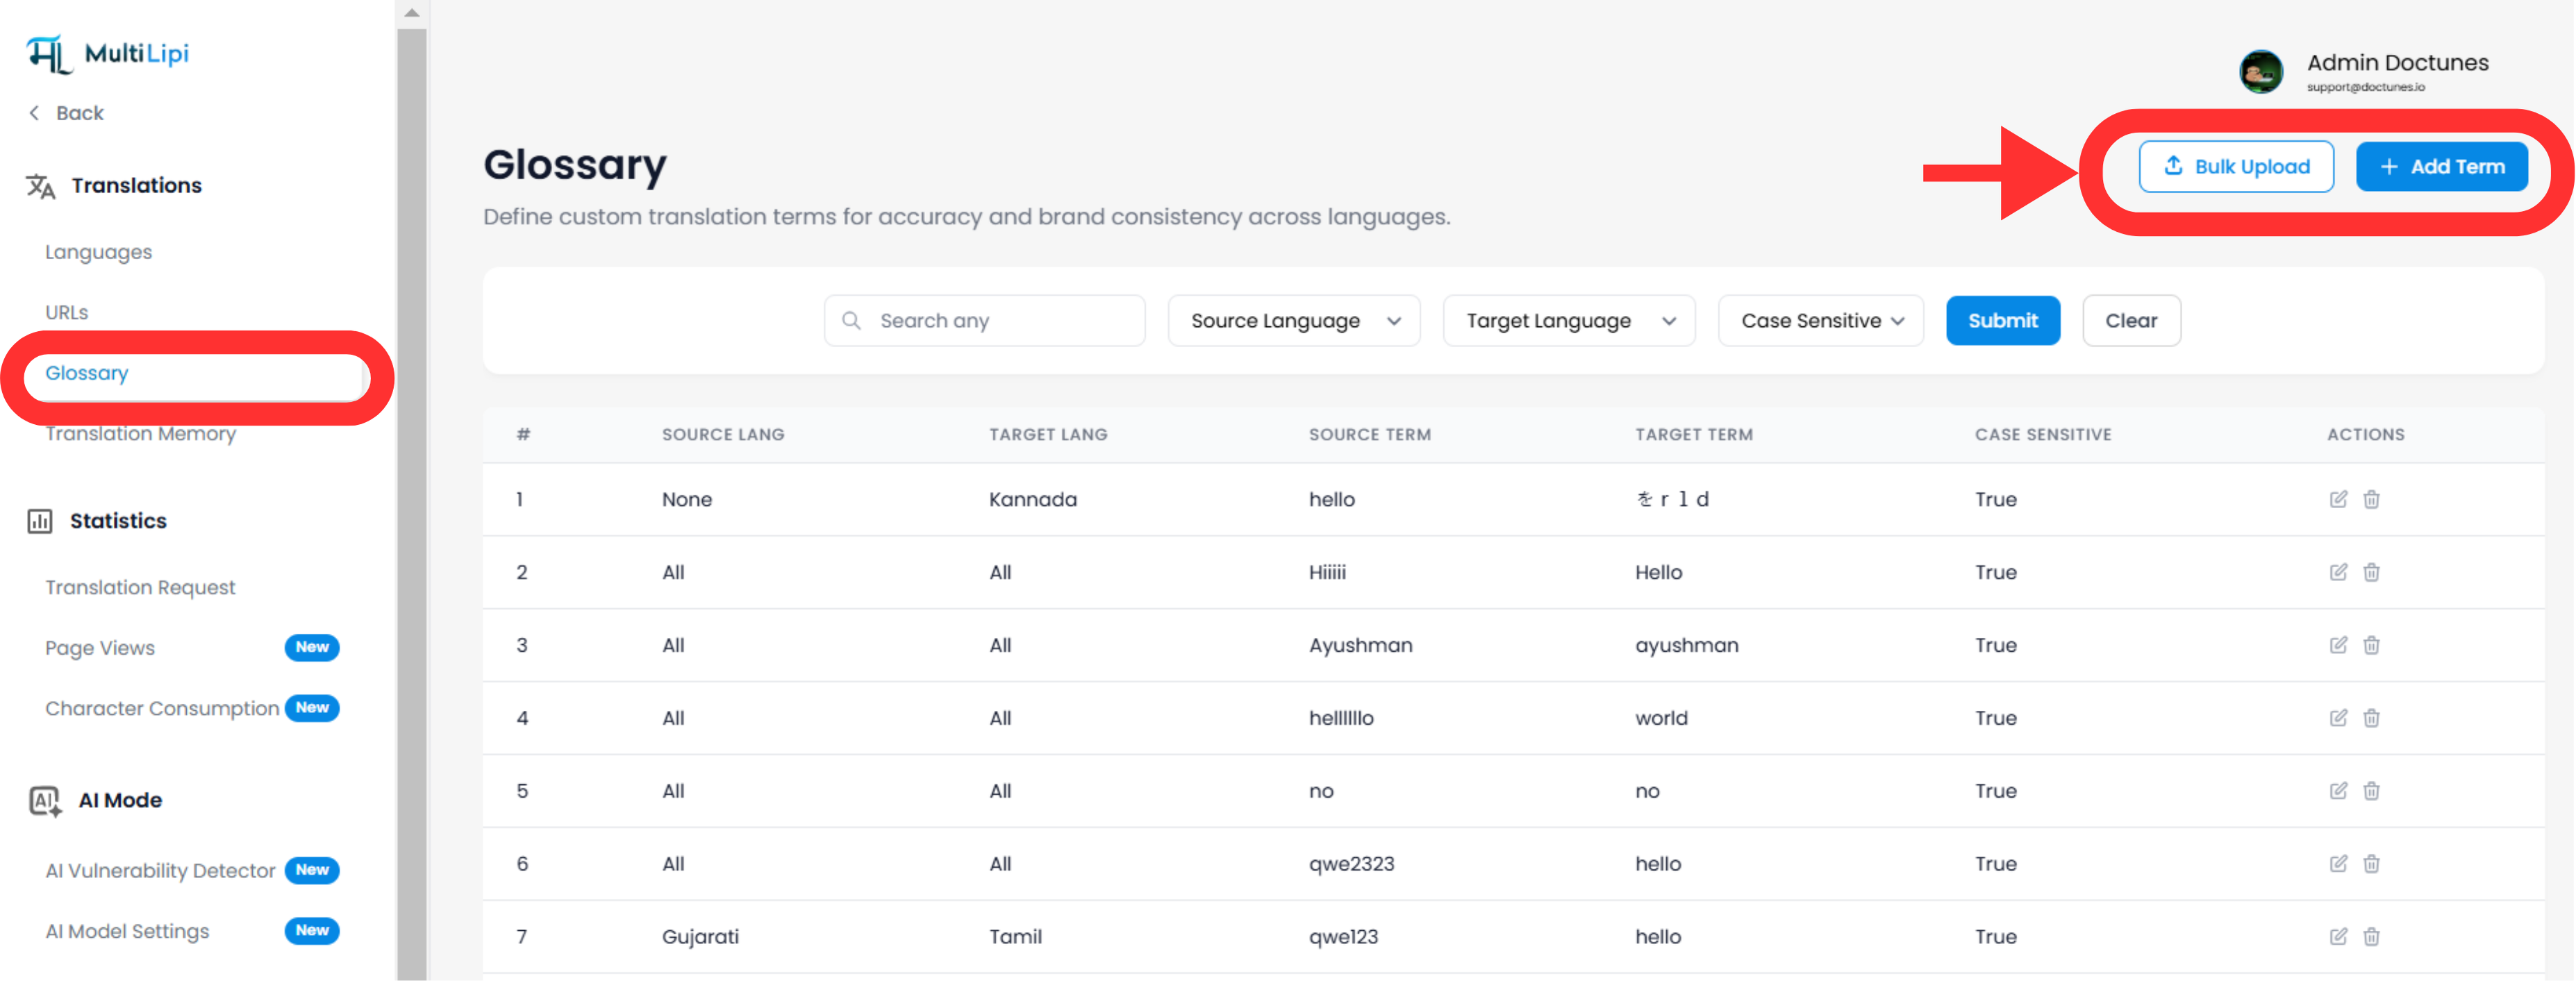
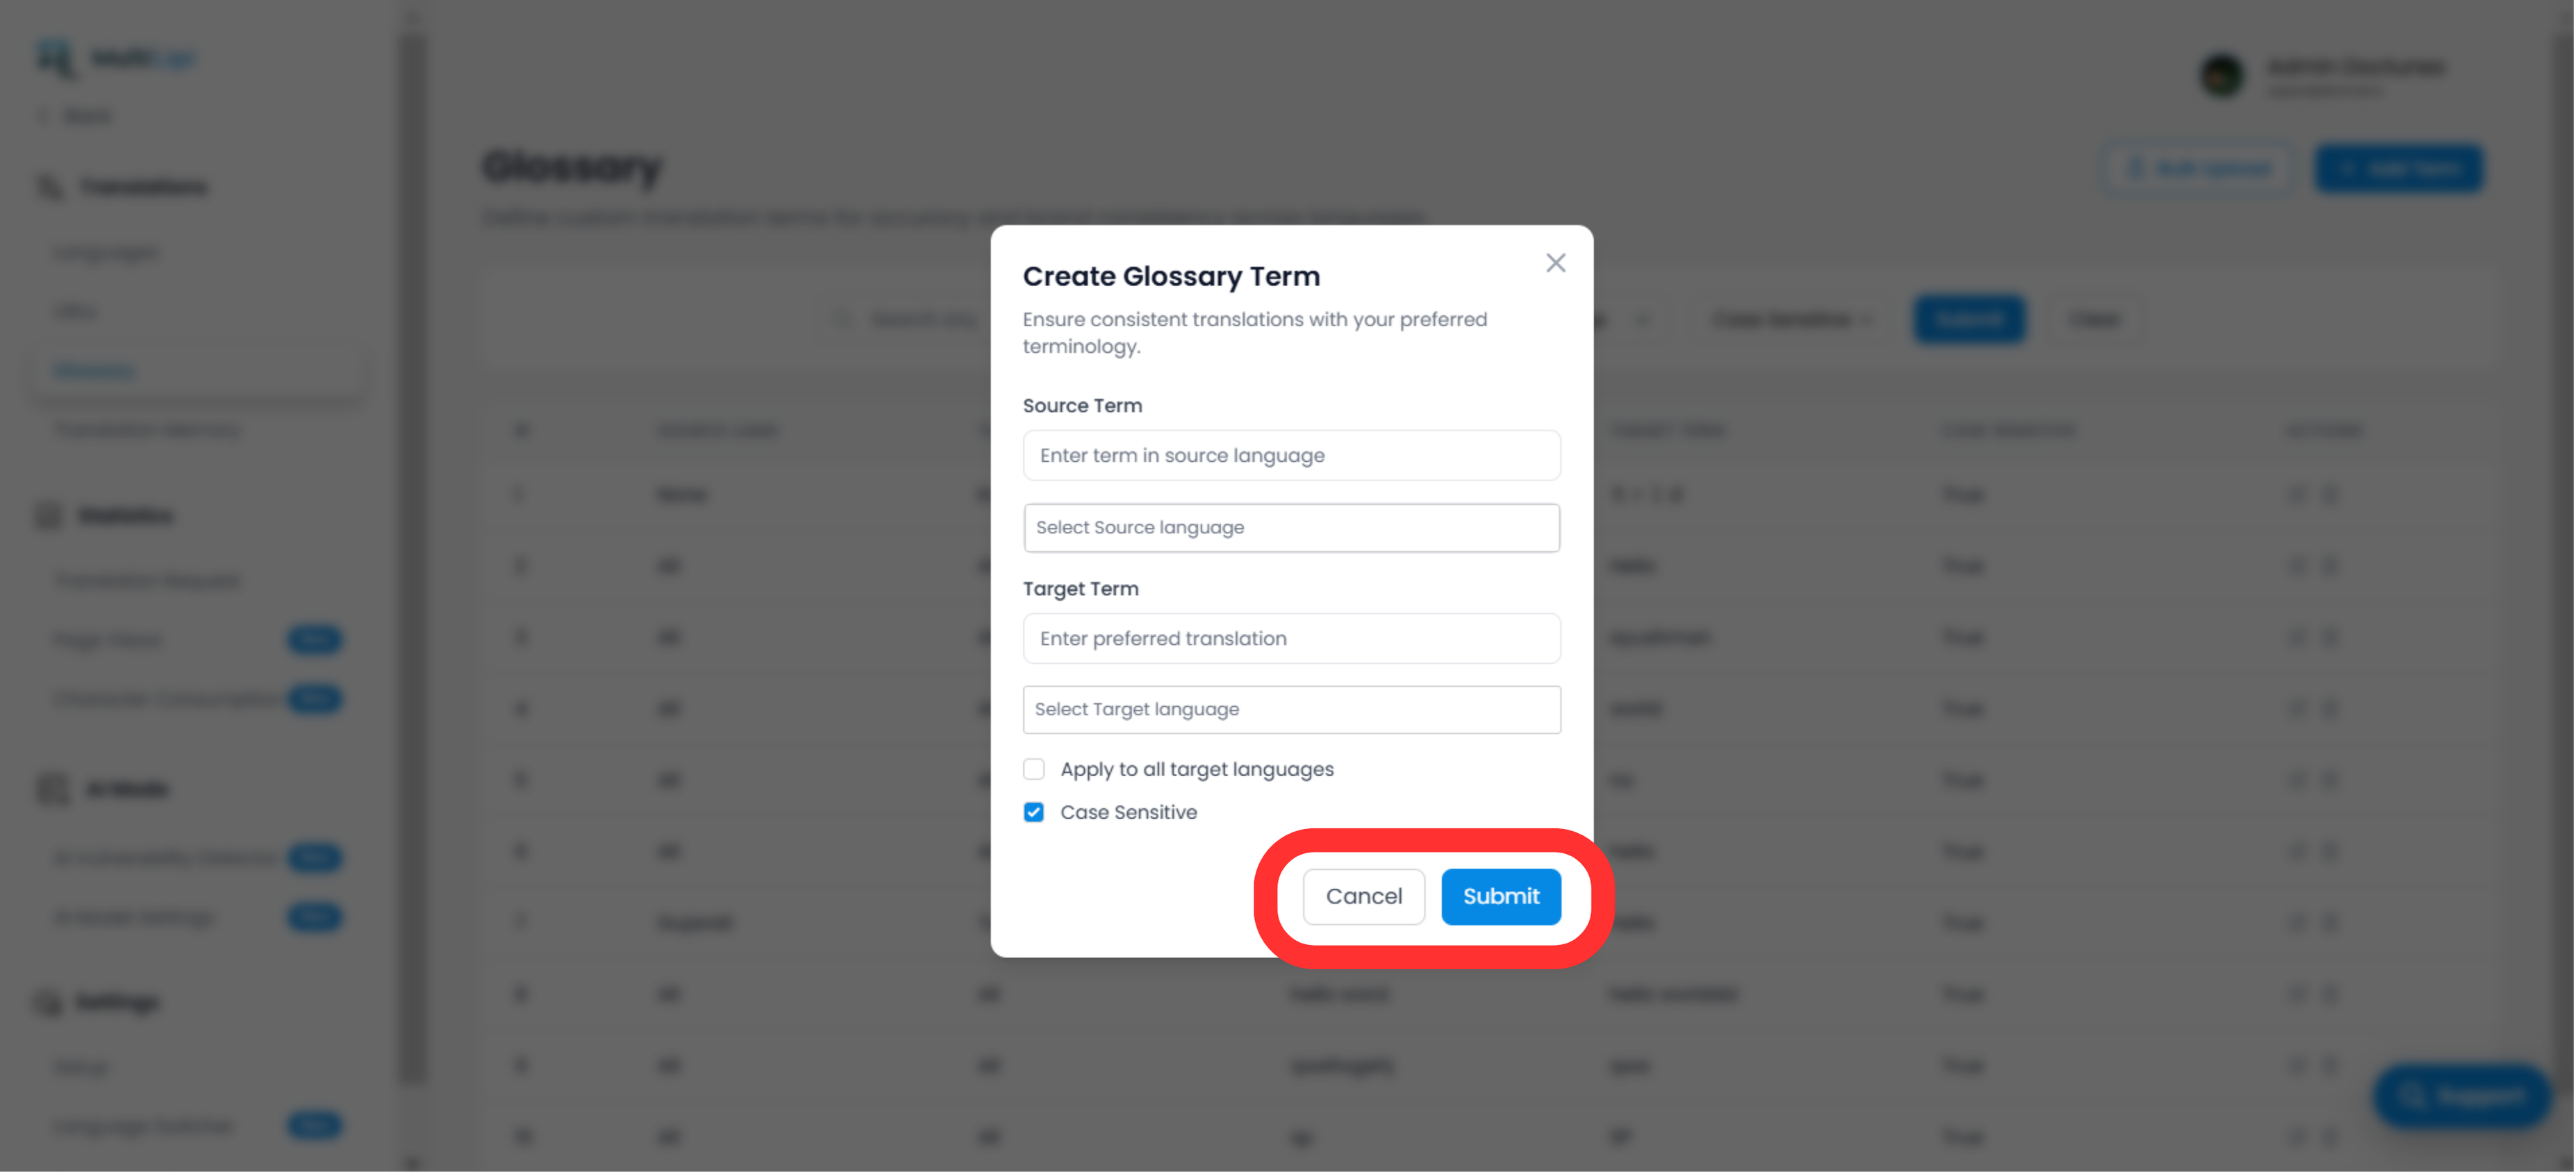
2. Add New Glossary Rule Manually
-
Click on the “New” button on the top-right corner.
- A popup will appear asking for:
- Source Term
- Target Term
- Source Language
- Target Language
- Optional: Apply to all languages
- Optional: Case sensitive flag
Once done, click Alistua to save the rule.
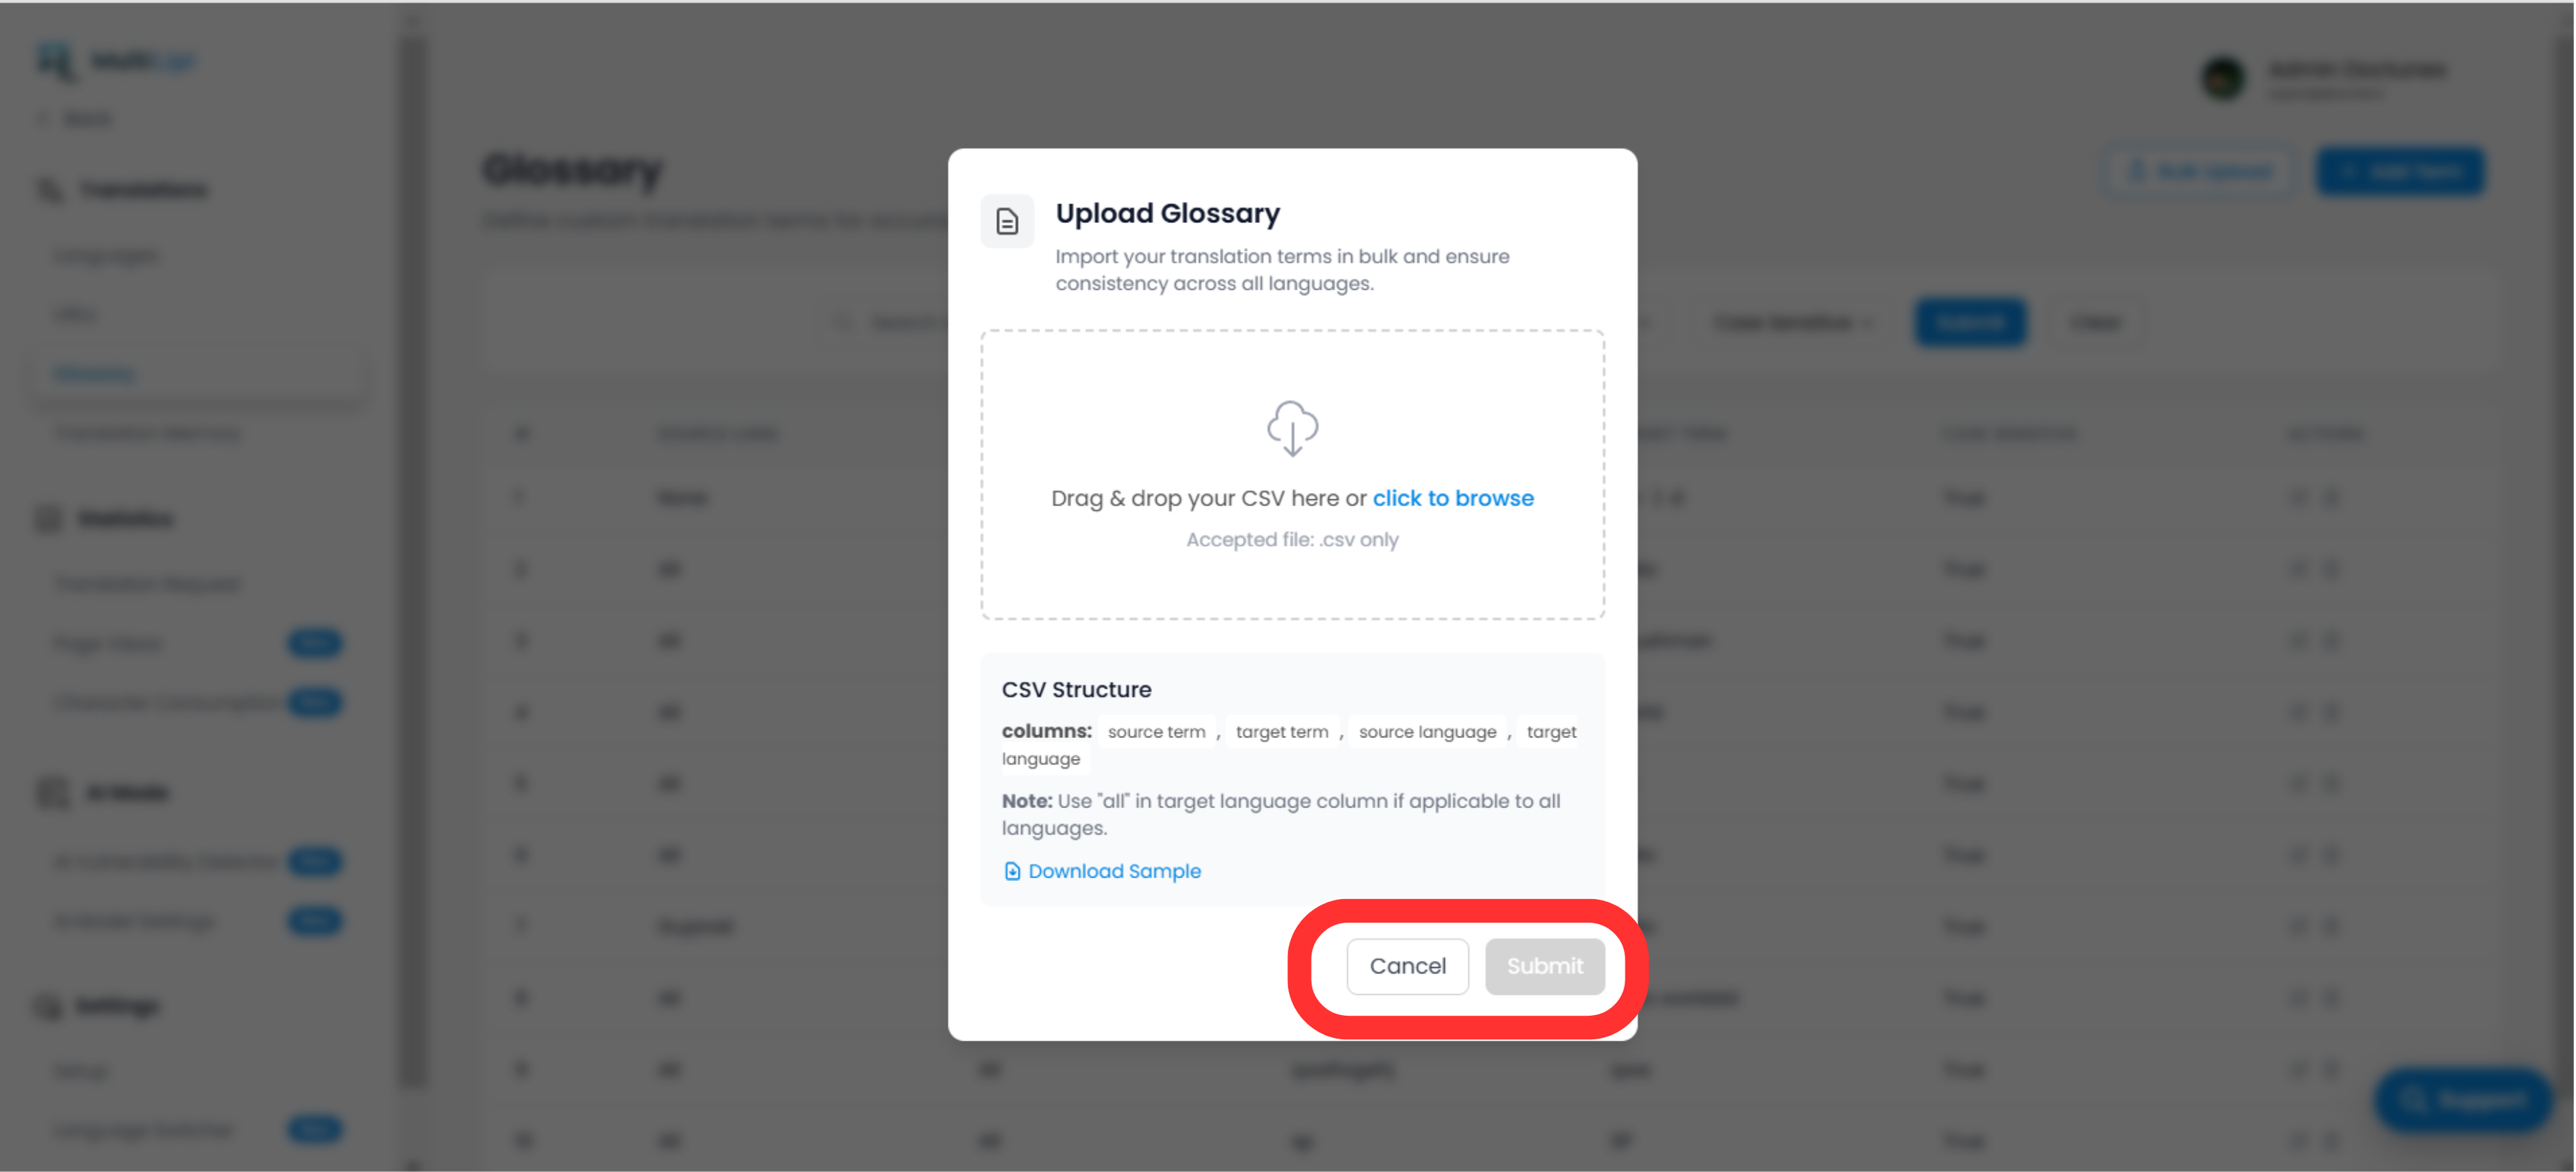
3. Upload Multiple Glossary Rules via CSV
If you have a large set of glossary terms:
- Click on the “Upload” button.
- A modal will open where you can choose your CSV file and upload.
- Make sure your CSV structure follows the format:
- source_term, target_term, source_language, target_language
- Käyttää "All" in language columns if applicable globally.
Click Alistua once ready.
Best Practices
-
Käyttää consistent casing when using case-sensitive rules.
-
Prefer single-word terms or short phrases to avoid incorrect partial matches.
- Regularly review glossary rules for updates in branding or compliance.
Why Use Glossary Rules?
-
Boosts Translation Accuracy: Locks the right version of your branded or industry terms.
-
Enhances SEO: Ensures your keywords are preserved properly across languages.
-
Saves Time: No need to manually adjust translations again and again.
- Supports Bulk Management: Easily maintain 1000s of terms via CSV uploads.
Kommentit